
📑 Table of Contents ▶
- Fried Fish Sandwich Preparation Essentials
- Fundamentals
- Preparation and Setup
- Directions
- Mastering the Technique behind Fried Fish Sandwiches
- Technique
- Tips and Tricks
- Perfecting the Results of Your Fried Fish Sandwich
- Perfecting Results
- Troubleshooting and Variations
- Serving and Storage of Fried Fish Sandwiches
- Serving and Presentation
- Pairings and Storage
Fried Fish Sandwich
Imagine warm summer afternoons spent at your favorite seaside shack, the aroma of freshly fried fish wafting through the air. This vivid memory often takes me back to carefree days, enjoying crispy fish sandwiches loaded with fresh toppings. The simple delight of sinking my teeth into a perfectly fried fish sandwich always brings a smile.
Fried fish sandwiches have become a cherished meal in my home. The combination of flaky fish, crunchy breading, and zesty homemade tartar sauce creates a symphony of flavors that tantalizes the taste buds. Gathering around the table with family and friends to enjoy a meal like this brings warmth and happiness, highlighting the joy of cooking.
Preparing a fried fish sandwich is straightforward and incredibly satisfying. Whether you’re after a quick family dinner or a casual gathering, this recipe delivers. By combining just a few ingredients, you can whip up a delicious sandwich that transports you to those sun-soaked beach days. Dive into this simple yet delightful fried fish sandwich recipe that will surely impress everyone at your table.
Fried Fish Sandwich Preparation Essentials
Fundamentals
Creating the perfect fried fish sandwich requires a few key ingredients and a bit of technique. The star of this dish is the fish fillets, which can vary in flavor and texture depending on the type you choose. Cod and tilapia make excellent options due to their mild taste and flaky consistency.
The breading process significantly influences the overall flavor and texture of the fried fish. Coating the fillets in a seasoned flour mixture, dipping them in an egg wash, and finally rolling them in breadcrumbs ensures a crunchy golden crust. Ensuring each step is followed closely will yield incredible results.
Preparation and Setup
Before diving into cooking, ensure your kitchen is ready. Gather all the necessary ingredients: fish fillets, flour, breadcrumbs, egg, milk, salt, pepper, and oil for frying. Also, prepare your sandwich buns and the fresh toppings—lettuce, tomatoes, and pickles.
Set up your workspace by creating a dredging station. Place the flour mixture in one bowl and the whisked egg and milk in another. This organization streamlines the breading process, making it easier to focus on perfecting each step without chaos.
Ingredients
Here’s everything you’ll need to make a satisfying fried fish sandwich:
- 2 fish fillets (such as cod or tilapia)
- 1 cup all-purpose flour
- 1 cup breadcrumbs
- 1 egg
- 1 cup milk
- Salt and pepper to taste
- Oil for frying
- 4 sandwich buns
- Homemade tartar sauce
- Lettuce, tomato, and pickles for toppings
Directions
- In a bowl, mix flour, salt, and pepper. In another bowl, whisk egg and milk together. Dip each fish fillet in the flour mixture, then the egg mixture, and finally in the breadcrumbs.
- Heat oil in a frying pan over medium heat. Fry each fillet until golden brown and cooked through, about 3-4 minutes on each side.
- Toast sandwich buns lightly.
- Assemble the sandwiches by placing a fried fish fillet on each bun, topping with homemade tartar sauce and fresh veggies.
- Serve immediately and enjoy!
Mastering the Technique behind Fried Fish Sandwiches
Technique
Frying fish may seem daunting, but with the right technique, anyone can achieve crispy, flaky results. The key lies in the oil temperature as well as the cooking time. Ensure your oil reaches the right temperature. Too low, and the fish absorbs excess oil; too high, and the crust will burn before the fish cooks through.
Always fry in batches to avoid overcrowding the pan, as this will lower the oil temperature and result in uneven cooking. Pay attention to the color of the crust; a perfect golden brown hue indicates that your fish is ready to be plated.
Tips and Tricks
To get the best results with your fish sandwich, here are a few useful tips:
- For an extra crunchy texture, consider double-dipping the fillets in the egg wash and breadcrumbs.
- If you want to pack in more flavor, add your favorite spices to the flour mixture for an exciting twist.
- Monitor the cooking time closely, as fish cooks quickly. Flipping meticulously promotes even browning on both sides.
Perfecting the Results of Your Fried Fish Sandwich
Perfecting Results
Achieving the perfect fried fish sandwich requires practice and attention to detail. If the fish is undercooked, it may be chewy, whereas overcooked fish can become dry. Utilize a meat thermometer if you want to ensure your fish reaches 145°F internally.
Experiment with different types of fish for varied flavor profiles. Firm fish such as halibut or snapper can hold up well during frying, while delicate species like flounder provide a flakier result.
Troubleshooting and Variations
If your fish doesn’t turn out as expected, it helps to troubleshoot the potential issues:
- If the breading falls off, ensure each fish fillet is adequately coated in flour before dipping in the egg wash.
- If the oil splatters, check whether the oil is at the right temperature. Too hot or introducing wet fish into the oil can cause this.
Consider variations by swapping out your toppings or sauce. Try adding a spicy aioli or experimenting with different vegetables for a fresh take on the classic sandwich.
Serving and Storage of Fried Fish Sandwiches
Serving and Presentation
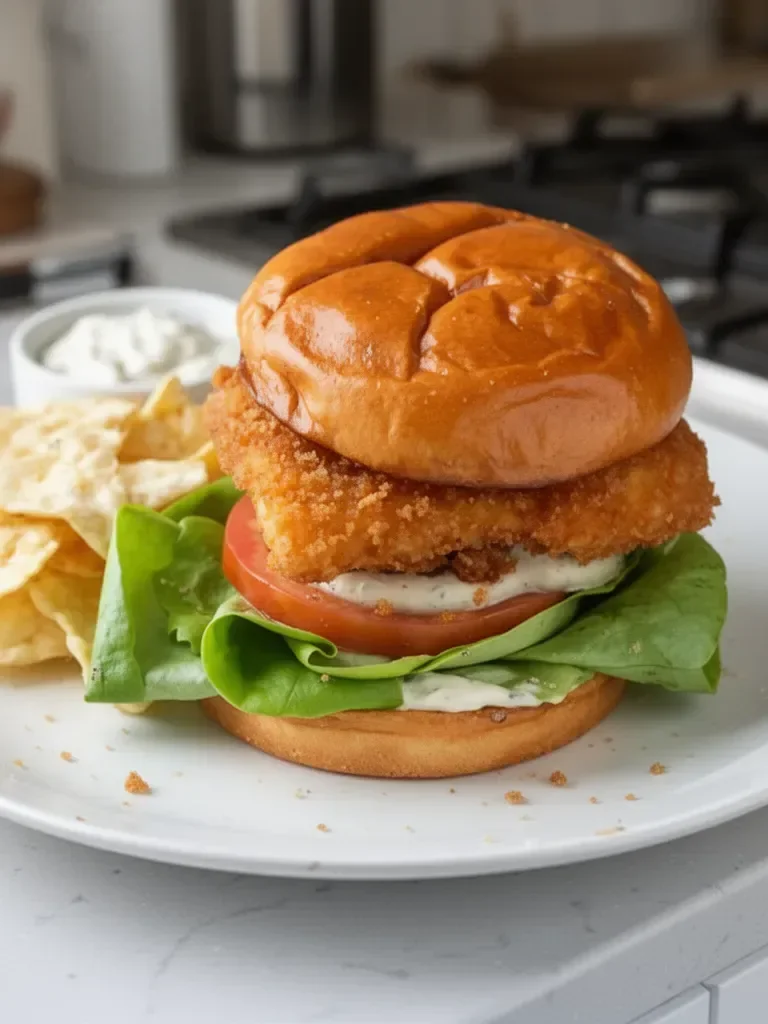
Once your fried fish sandwiches are assembled, it’s time to serve! Present each sandwich on a colorful plate, topped with fresh lettuce, tomatoes, and pickles for that extra crunch and color. Offer additional tartar sauce on the side for those who love a little extra flavor.
Pair these sandwiches with crispy fries or a refreshing coleslaw for a complete meal. Gathering everyone around the table to share these delicious, crispy sandwiches is a perfect way to create lasting memories.
Pairings and Storage
To ensure your fried fish sandwiches remain fresh, store leftover components separately. Keep the fried fish in an airtight container and refrigerate for up to two days. Prepare the sandwiches fresh to maintain optimal texture, as the bread will become soggy over time.
If you want to enjoy this dish later, consider freezing the cooked fish fillets. Reheat them in an oven to preserve the crunch. Always serve with fresh toppings for the best taste experience.
In conclusion, making your own fried fish sandwich at home is not only satisfying but also a lot easier than one might think. With a few ingredients and some simple techniques, you can create a dish that’s loved by all. Dive into the flavors of this classic seafood dish and share the joy with family and friends.
Print
Fried Fish Sandwich
- Prep Time: 15 minutes
- Cook Time: 15 minutes
- Total Time: 30 minutes
- Yield: 4 servings
- Category: Main Course
- Method: Frying
- Cuisine: Seafood
- Diet: Pescatarian
Description
A crispy and delicious fried fish sandwich with fresh toppings and homemade tartar sauce, perfect for summer afternoons.
Ingredients
- 2 fish fillets (such as cod or tilapia)
- 1 cup all-purpose flour
- 1 cup breadcrumbs
- 1 egg
- 1 cup milk
- Salt and pepper to taste
- Oil for frying
- 4 sandwich buns
- Homemade tartar sauce
- Lettuce, tomato, and pickles for toppings
Instructions
- Mix flour, salt, and pepper in a bowl. In another bowl, whisk egg and milk together.
- Dip each fish fillet in the flour mixture, then the egg mixture, and finally in the breadcrumbs.
- Heat oil in a frying pan over medium heat.
- Fry each fillet until golden brown and cooked through, about 3-4 minutes on each side.
- Toast sandwich buns lightly.
- Assemble the sandwiches by placing a fried fish fillet on each bun, topping with homemade tartar sauce and fresh veggies.
- Serve immediately and enjoy!
Notes
For an extra crunchy texture, consider double-dipping the fillets in the egg wash and breadcrumbs.
