📑 Table of Contents ▶
- Truly Crispy Salt and Pepper Squid
- Mastering Truly Crispy Salt and Pepper Squid
- Fundamentals
- Preparation and Setup
- Perfecting the Technique
- Technique
- Tips and Tricks
- Achieving Perfect Results
- Perfecting Results
- Troubleshooting and Variations
- Serving and Presentation
- Serving and Presentation
- Pairings and Storage
- Conclusion
- FAQs – Truly Crispy Salt and Pepper Squid
Sharing my love for seafood has always been a passion, and there’s nothing quite as satisfying as biting into Truly Crispy Salt and Pepper Squid. Growing up by the sea, I remember weekends spent with family, feasting on fresh catches. This dish always stood out with its golden, crispy texture and the delightful contrast of salt and pepper.
In my coastal community, seafood is more than just a meal; it’s a way of life. When I first learned to cook crispy salt and pepper squid, I was hooked by the simplicity and the depth of flavor it offered. Every bite took me back to those cherished gatherings and the joy of sharing food with loved ones.
The key to Truly Crispy Salt and Pepper Squid lies in the preparation and technique. With the right ingredients and a bit of patience, this dish is a testament to how simple elements can create something extraordinary. Let’s dive into the steps that transform humble squid into a crispy, flavorful delight.
Print
Truly Crispy Salt and Pepper Squid
- Prep Time: 30 minutes
- Cook Time: 20 minutes
- Total Time: 50 minutes
- Yield: 4 servings
- Category: Appetizer
- Method: Frying
- Cuisine: Asian
Description
Learn how to make truly crispy salt and pepper squid at home with our easy recipe. Achieve restaurant-quality results in your own kitchen. Click here now!
Ingredients
- – 700 g (1.5 lb) medium whole baby squid, cleaned
- – 500 g (1 lb) squid tubes, already cleaned
- – 2/3 cup (160 ml) cornflour / cornstarch
- – 1/3 cup (80 ml) plain / all-purpose flour
- – 1/2 tsp (3 ml) baking powder
- – 1/2 tsp (3 ml) cooking salt
- – 1/4 tsp (1 ml) white pepper powder
- – 2/3 cup (160 ml) cold tap water
- – 3 – 4 cups (840 ml) vegetable oil (~4 cm / 1.5″ depth in a pot)
- – Cooking salt – just a pinch!
- – White pepper powder
- – 1/2 cup (120 ml) mayonnaise or kewpie
- – 1/2 tsp (3 ml) finely grated garlic
Instructions
- Open up the squid tubes by cutting along one side to create a flat sheet. Use a paper towel to thoroughly dry both surfaces.
- Using a small, sharp knife, lightly score the interior of the squid in a diamond pattern, taking care not to slice through completely.
- Cut the squid into rectangular pieces, approximately 5 x 2 cm in size.
- Combine the specified ingredients in a bowl and let them sit for at least 20 minutes, or up to a full day.
- For the batter, combine the flour, cornflour, baking powder, and salt in a bowl. Gradually whisk in water until the mixture is smooth. Chill in the refrigerator for half an hour.
- Pour oil into a sturdy pot or large pan until it reaches a depth of about 4 cm. Heat the oil on medium-high until it reaches 160°C/320°F.
- Quickly whisk the batter once more, then add all the squid pieces, ensuring they are evenly coated.
- Cook the squid in three separate batches. Allow any excess batter to drip off, then carefully place the squid into the hot oil. Use chopsticks to separate any pieces that stick together.
- Fry the baby squid for 2 minutes and the larger squid tubes for 3 minutes until they are a light golden color. Remove them using a spider or slotted spoon and place them on a tray lined with paper towels.
- Repeat the frying process for the remaining squid, making sure the oil is back up to temperature before each new batch.
- Turn up the heat to high, and raise the oil temperature to 200°C/390°F.
- Prepare a large mixing bowl by lining it with two layers of paper towels.
- Fry half of the squid in the oil—it’s fine if the pot is crowded. Cook for 1 1/2 minutes until the squid turns a deep golden and crispy. Move them to the prepared bowl. Reheat the oil to 200°C/390°F and fry the remaining squid.
- Remove the paper towels from the bowl and season the squid to your liking with salt and pepper, tasting as you go since the batter already contains salt. Mix well.
- Transfer the crispy squid to a serving dish and pair it with mayonnaise. The batter ensures the squid remains crispy, even when cooled.
Notes
Mastering Truly Crispy Salt and Pepper Squid
Fundamentals
To start, understanding the fundamentals of Truly Crispy Salt and Pepper Squid is essential. The beauty of this dish lies in its simplicity, with baby squid and squid tubes as the stars of the show. Using fresh, cleaned squid ensures the best texture and flavor.
Combining cornflour, plain flour, baking powder, and salt creates the perfect batter. This mixture gives the squid a light, airy coating that crisps up beautifully when fried. The addition of white pepper powder adds a subtle heat, enhancing the overall flavor without overpowering the delicate squid.
Preparation and Setup
Begin by preparing the squid. Open up the squid tubes to create flat sheets and pat them dry thoroughly. Scoring the interior of the squid in a diamond pattern ensures even cooking and helps the batter adhere better. Cut the squid into manageable rectangular pieces, approximately 5 x 2 cm in size.
Before you begin frying, combine the dry ingredients for the batter in a bowl and gradually whisk in cold water until smooth. Allow the batter to chill in the refrigerator for half an hour, ensuring it’s ready when needed. Meanwhile, heat vegetable oil in a sturdy pot to the recommended depth, preparing for the frying process.
Perfecting the Technique
Technique
Executing the right technique is crucial for Truly Crispy Salt and Pepper Squid. Start by preheating the oil to 160°C (320°F). Quickly whisk the batter once more and coat the squid pieces evenly. Ensuring the batter is cold and the oil is at the correct temperature is key to achieving the desired crispiness.
Fry the squid in batches to prevent overcrowding, which can lower the oil temperature. Use chopsticks to separate any pieces that stick together. Fry the baby squid for approximately 2 minutes and the larger squid tubes for 3 minutes until they turn a light golden color.

Truly Crispy Salt and Pepper Squid
Tips and Tricks
For the best results, maintain a consistent oil temperature throughout the frying process. Allow the oil to reheat between batches to ensure each piece is fried to perfection. After the initial frying, increase the oil temperature to 200°C (390°F) for a final quick fry, which enhances the crispiness.
Season the squid immediately after frying while it’s still hot. This helps the salt and pepper adhere better, giving each bite an irresistible flavor. If you’re a fan of seafood, you might also love Chinese Salt and Pepper Shrimp, which shares similar seasoning principles.
Achieving Perfect Results
Perfecting Results
To achieve truly crispy salt and pepper squid, focus on perfecting each step. From patting the squid dry to maintaining oil temperature, every detail contributes to the final outcome. Ensuring the batter is smooth and cold before coating the squid is essential for a light, crispy finish.
For those seeking variety, consider incorporating different seasonings into the batter. Adding a pinch of chili powder can introduce a spicy kick, while a dash of garlic powder enhances the savory notes. For more adventurous culinary experiences, explore Crab and Shrimp Stuffed Peppers on Seafood Dish Recipes.
Troubleshooting and Variations
If you encounter issues with your squid not being crispy enough, ensure the batter is cold and the oil is hot before frying. Additionally, using a slotted spoon or spider to remove excess batter can prevent sogginess. For those looking to experiment, try different flour combinations for the batter or add herbs for a fresh twist.
Variations on this dish are endless, allowing you to tailor it to your preferences. Whether you prefer a more peppery flavor or a hint of citrus, adjustments can be made to suit your taste. For a fusion twist, pair the squid with Crispy Chicken Bell Pepper Ranch Burritos for a flavorful meal.
Serving and Presentation
Serving and Presentation
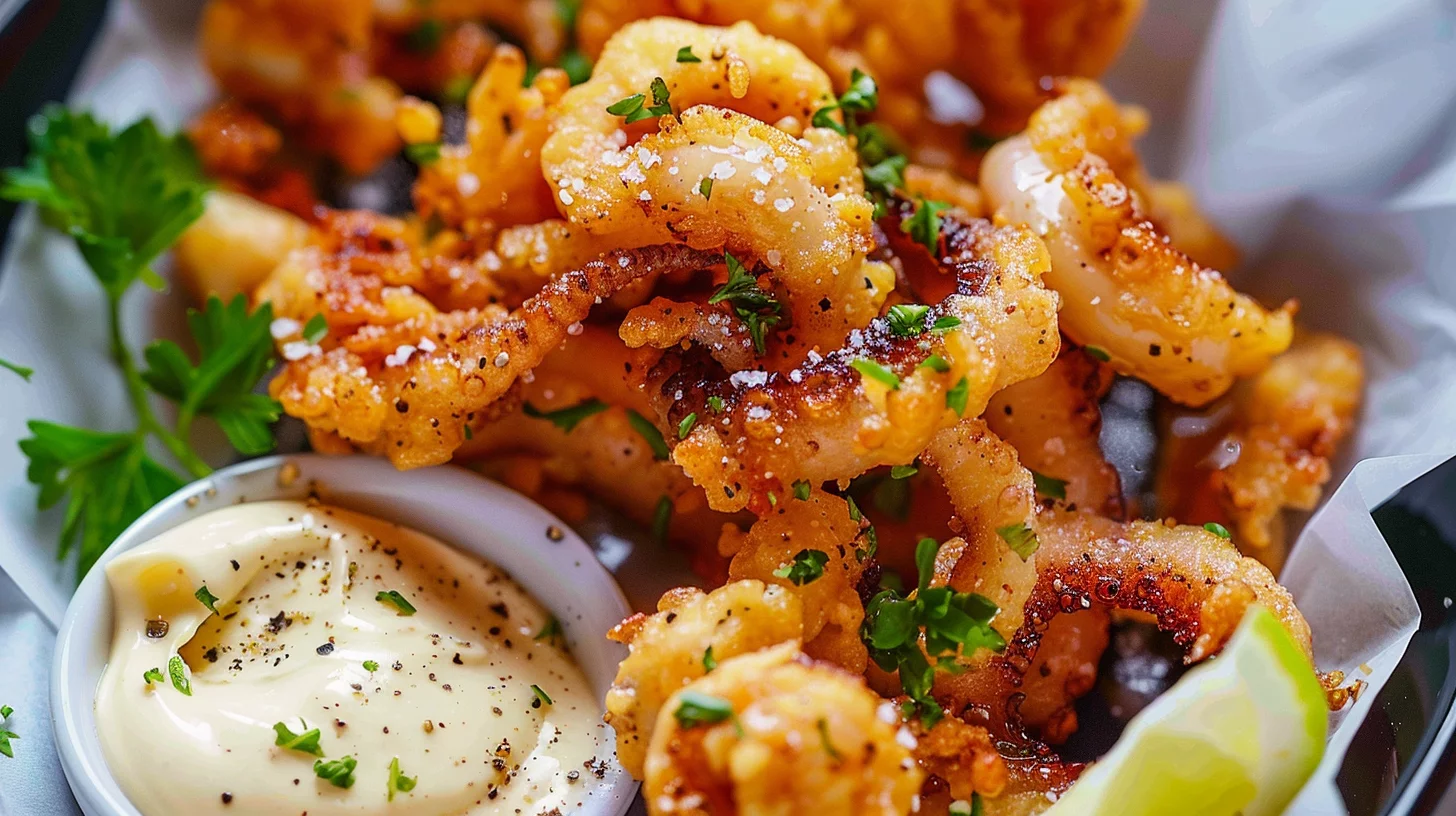
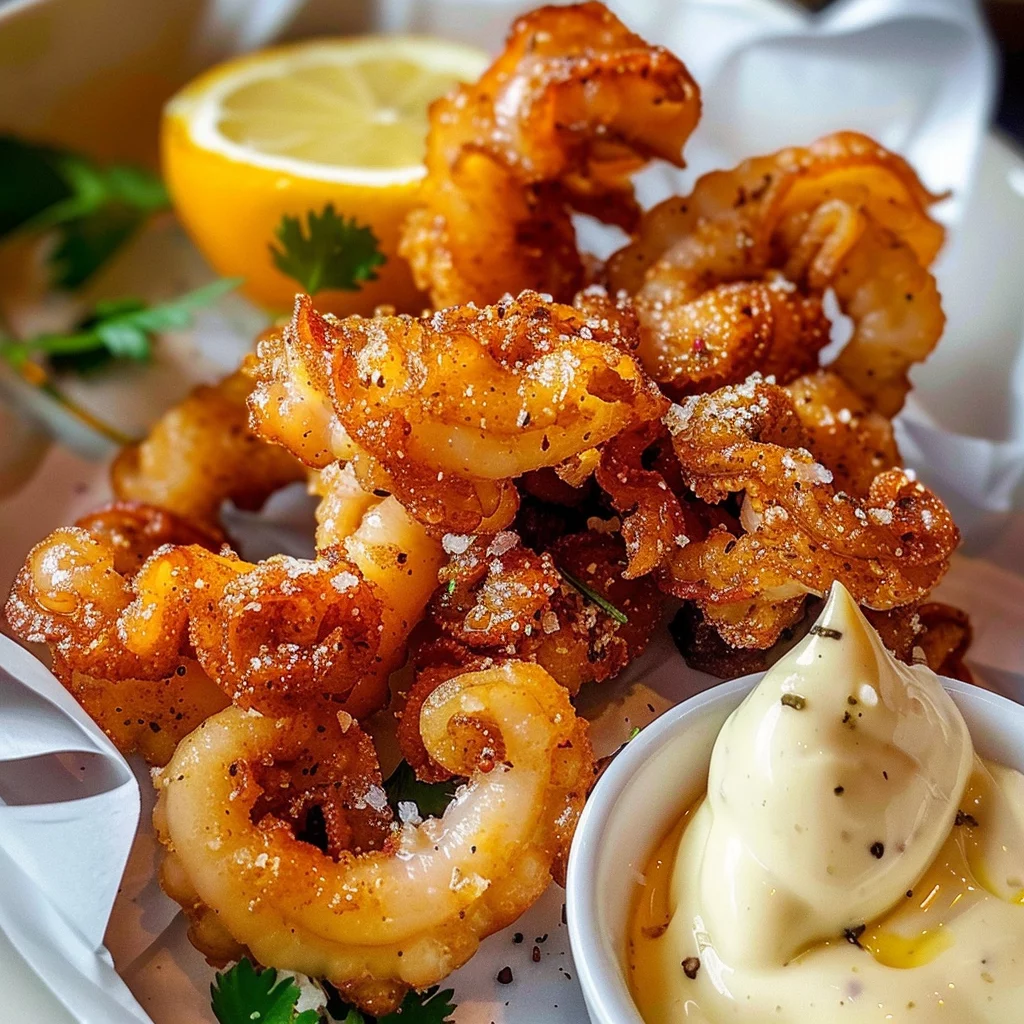
Presenting Truly Crispy Salt and Pepper Squid with style elevates the dining experience. Arrange the crispy squid on a serving dish lined with paper towels to absorb any excess oil. The golden hue of the squid against a vibrant plate makes for an eye-catching presentation.
Pair the crispy squid with a side of mayonnaise or kewpie, garnished with finely grated garlic. This simple yet flavorful pairing enhances the dish and adds a creamy contrast to the crispy texture. For serving inspiration, consider the Crispy Bacon Mozzarella Poppers, which offer a similar indulgent experience.
Truly Crispy Salt and Pepper Squid
Pairings and Storage
When it comes to pairing, opt for fresh salads or light appetizers to complement the squid. A simple citrus salad or steamed vegetables provide a refreshing balance to the rich, crispy dish. For more seafood inspiration, explore the Ultimate Southern Style Seafood Boil for a complete meal experience.
Store any leftover squid in an airtight container in the refrigerator. To maintain crispiness, reheat in a preheated oven rather than a microwave. This ensures the squid remains as delicious as when first cooked, ready to enjoy once more.
Conclusion
Truly Crispy Salt and Pepper Squid exemplifies the beauty of simple ingredients combined with precise technique. By mastering the art of frying and seasoning, you can create a dish that is both satisfying and memorable. The utility of this recipe lies in its adaptability, allowing for endless variations to suit any palate.
From the preparation of the squid to the final presentation, each step plays a crucial role in achieving the perfect dish. The strengths of this recipe are its versatility and the joy it brings to any seafood enthusiast. Explore more delightful seafood recipes like the Crispy Sous Vide Chicken Thighs to expand your culinary repertoire.
