
📑 Table of Contents ▶
Pickled Sushi Ginger (Homemade Gari)
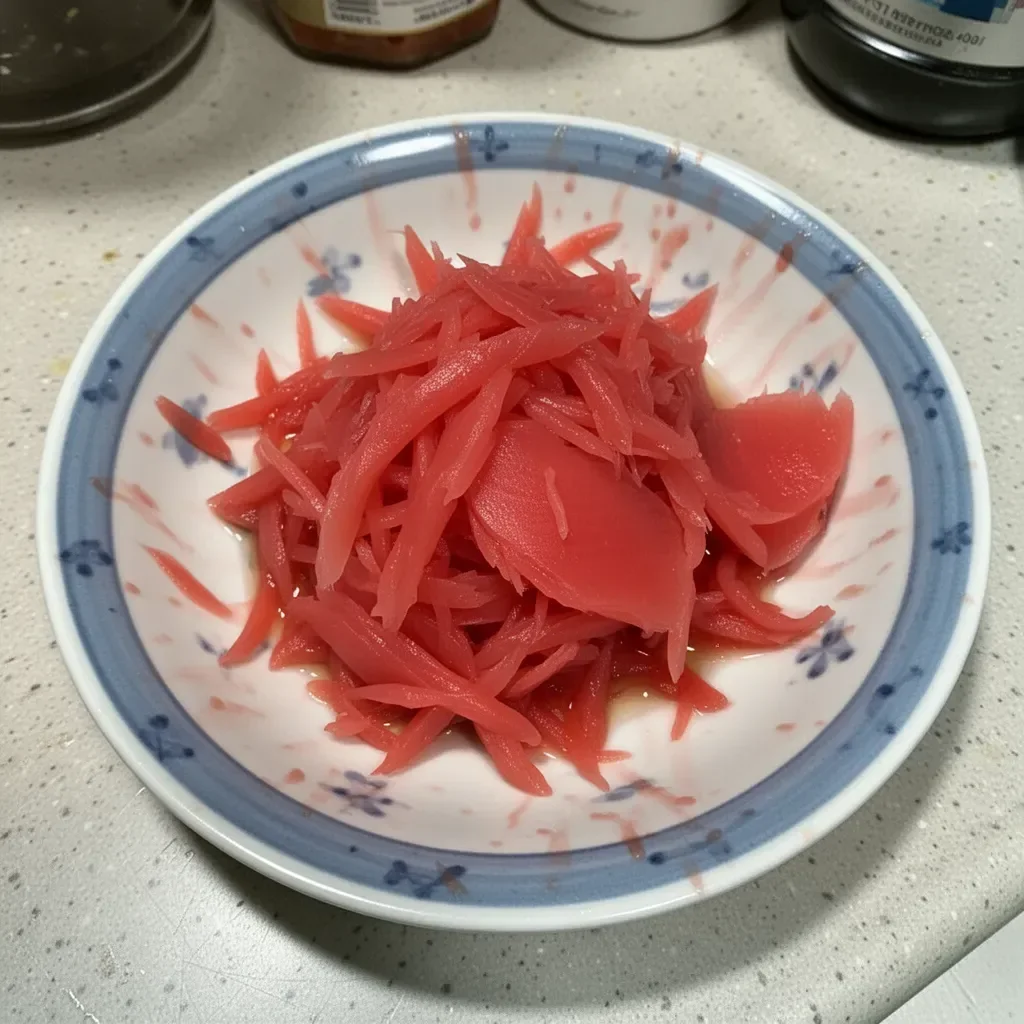
Ginger holds a special place in my heart, especially in its pickled form. Known as gari, this vibrant and flavorful addition transforms any sushi experience. I fondly recall enjoying sushi with friends while savoring the tangy, sweet bite of the pickled ginger between each roll. The balanced flavor of ginger enhances not only sushi but also many other dishes, making it a treasured staple in my kitchen.
Zipping through the bustling aisles of the market, I always looked for fresh ingredients, excited to recreate my favorite sushi restaurant experience at home. While sushi rice and fresh fish find their way into my cart, young ginger always invites itself along. It’s remarkable how one ingredient can elevate a dish. Homemade gari, with its slight sweetness and tanginess, pairs beautifully with seafood and even adds a delightful kick to salads.
Embarking on the journey to make pickled sushi ginger invokes a sense of nostalgia for me, bridging the gap between my kitchen and the sushi bar. It’s a simple process that rewards you with a garnish bursting with flavor. The joy of making your own gari echoes in the taste of every slice, making sushi nights at home a celebration of flavor.
Pickled Sushi Ginger Recipe
Fundamentals
Understanding the basics of pickling ginger makes the process quickly accessible. The ingredients list is straightforward, focusing primarily on water, vinegar, sugar, and the star—ginger itself. Start by recognizing the type of ginger needed. Young ginger root, known as shin shoga, has tender pink stems that contribute to the unique appearance and flavor of your gari. This variety makes it ideal for pickling, providing a milder taste than older ginger.
The pickling process highlights the harmonious balance of sweet and tangy flavors. Rice vinegar often takes the lead in the mixture, providing a soft, fragrant acidity that complements the ginger beautifully. Light brown sugar infuses a deep sweetness, but swapping it out for white sugar can yield a cleaner pink hue, enhancing the visual appeal of the gari.
Also important is the inclusion of a piece of dried kombu, which enriches the flavor profile of the pickling liquid. Kombu adds umami depth without overpowering the ginger. Understanding these fundamentals lays the groundwork for a successful pickling experience.
Preparation/Setup
Before diving into preparation, gather all your ingredients. You’ll need 250 ml of water, 125 ml of rice vinegar or white vinegar, 80 g of light brown or white sugar, 1 tsp of Japanese light soy sauce (or regular soy sauce with a pinch of salt), 1 small piece of dried kelp (about 5 cm), 340 g of young ginger root, and 1 tsp of salt.
-
Making the Pickling Liquid: Start by taking a saucepan. Add 250 ml of water, 125 ml rice vinegar, and 80 g light brown sugar, along with the soy sauce and dried kelp. Heat the mixture over medium heat until it nears boiling, then remove it from the stove and allow it to cool down.
-
Preparing the Ginger: While your pickling liquid cools, focus on the ginger. Cut 340 g of young ginger into 5 cm pieces. Place these ginger pieces in a bowl of water, gently scrubbing the surface with your fingers. This cleaning process allows you to rid the ginger of any dirt or imperfections.
-
Skin Removal: Use the edge of a spoon to scrape off the outer skin and any discolored spots on the ginger. As you prepare the ginger, be sure to set aside the pink stems, as they contribute both flavor and color to your finished gari.
-
Slicing the Ginger: With a sharp knife, slice each piece of ginger as thinly as possible. The thinner the slices, the better they will absorb the pickling liquid’s flavors.
-
Blanching: Bring a pot of water to a rolling boil and add the ginger slices, including the pink parts. Blanch the ginger for 1 minute to soften it slightly.
-
Draining and Salting: After blanching, drain the ginger slices in a colander and sprinkle with 1 tsp of salt. Allow the ginger to rest until it cools enough to handle.
-
Squeezing Out Liquid: Once cooled, gently squeeze out any excess liquid from the ginger.
-
Pickling the Ginger: When the pickling liquid cools, transfer it to a sealable container. Remove the kombu piece and add the blanched ginger slices to the liquid. Don’t forget to add the pink parts that you set aside earlier; they’ll enhance the color and flavor of your gari.
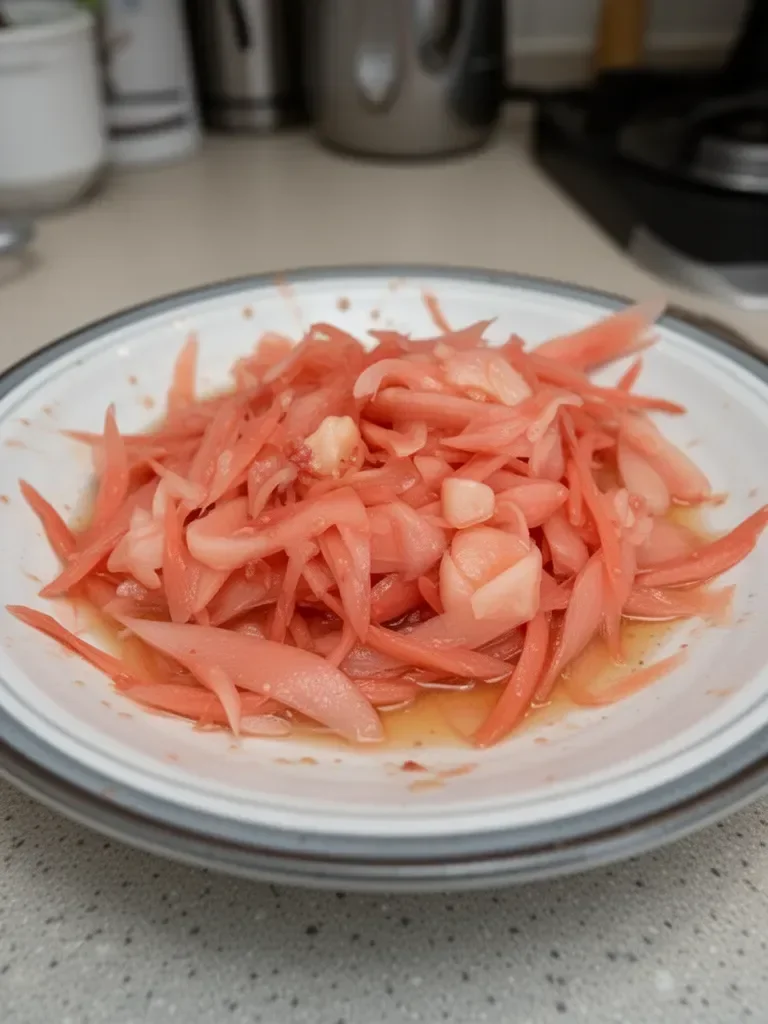
Cover the container and let the ginger rest in the refrigerator for at least 24 hours. The pickling process will work its magic, infusing the ginger with that perfect sweet and sour balance.
Tips for Pickled Sushi Ginger
Technique
Mastering the technique for making pickled sushi ginger can elevate your culinary skills. Attention to detail ensures a successful outcome. The goal is to keep the process simple yet effective. Accurately measuring liquids and ingredients is vital for achieving the right flavor balance.
For those striving for precision, consider using a digital scale to measure the ginger. This can help you maintain consistency throughout your pickling adventures. Additionally, slicing the ginger evenly will ensure uniform pickling, allowing all pieces to soak in the flavorful liquid.
Tips/Tricks
Here are a few helpful tips to ensure your gari turns out perfectly every time:
-
Fresh Ginger: Choose the freshest young ginger available for optimal flavor and softness. Look for roots with smooth skin and vibrant pink stems.
-
Adapting the Sweetness: Feel free to adjust the level of sugar according to your taste preferences. A sweeter gari serves as a delightful contrast to savory sushi.
-
Refrigeration Time: Giving the ginger sufficient time in the refrigerator maximizes flavor. Patience is key; 24 hours is the bare minimum, but longer is always better for deeper flavor development.
-
Explore Variations: Experiment with the addition of spices like crushed red pepper or a hint of garlic to create a unique twist on traditional gari.
Perfecting Pickled Sushi Ginger
Perfecting Results
Making pickled sushi ginger requires practice, but with each attempt, you’ll refine your skills. Adjust your technique based on previous outcomes. If you find your ginger too salty, reduce the salt in your blanching step next time. Conversely, if the flavor is lacking, add more sugar or vinegar during preparation for a flavor boost.
Mind the thickness of your ginger slices, as thinner pieces pickle more thoroughly and retain a delightful crunch. Consistency will yield predictably excellent results, lifting your dish to new heights each time.
Troubleshooting/Variations
Encountering pitfalls during pickling is normal, but solutions are readily available:
-
Too Soft or Mushy Ginger: If the ginger becomes overly soft, consider reducing the blanching time. Just a quick minute will maintain a fresh crunch.
-
Flavor Issues: If the pickling liquid tastes off, evaluate your ingredient measurements. Balancing vinegar, sugar, and salt is essential. A little extra pinch of sugar can work wonders if the flavor is sour.
-
Storage Issues: If you notice liquid loss over time, it may be necessary to top it up with a little extra vinegar to keep the ginger submerged and flavorful.
Feel free to explore variations in the pickling process. Adding different spices or experimenting with varying levels of sweetness can yield rewarding results.
Serving Pickled Sushi Ginger
Presentation
When serving pickled sushi ginger, presentation can elevate your dining experience. Use small, attractive dishes or ramekins to display the ginger slices. The vibrant pink hue contrasts beautifully with the colors of sushi and sashimi, making it a feast for the eyes.
Consider garnishing with sesame seeds or fresh herbs to add a touch of sophistication when serving. Pairing your gari with a colorful platter can encourage appreciation of both its look and taste.
Pairings/Storage
Gari complements an array of dishes beyond just sushi. Use it as an invigorating garnish for rice bowls, poke bowls, or even salads. Including it alongside seafood enhances the overall flavor profile of the meal.
Store your pickled ginger in the refrigerator. Properly sealed containers will prolong its shelf life for up to several months. Periodically check the color and smell, ensuring it remains vibrant and fragrant.
Creating your own pickled sushi ginger is a fulfilling process, adding depth and flavor to your meals in simple yet profound ways.
Making pickled sushi ginger at home embodies the perfect blend of flavor, nostalgia, and creativity. It celebrates moments shared over delicious food while allowing you the freedom to tweak and perfect each creation. Unlock your culinary potential and discover the joy of homemade gari.
Print
Pickled Sushi Ginger (Homemade Gari)
- Prep Time: 15 minutes
- Cook Time: 15 minutes
- Total Time: 30 minutes
- Yield: 4 servings
- Category: Condiment
- Method: Pickling
- Cuisine: Japanese
- Diet: Vegan
Description
A vibrant and flavorful pickled ginger known as gari, perfect for enhancing sushi and many other dishes.
Ingredients
- 250 ml of water
- 125 ml of rice vinegar or white vinegar
- 80 g of light brown sugar or white sugar
- 1 tsp of Japanese light soy sauce
- 1 small piece of dried kombu (about 5 cm)
- 340 g of young ginger root
- 1 tsp of salt
Instructions
- Gather all ingredients before starting.
- Combine water, rice vinegar, light brown sugar, soy sauce, and kombu in a saucepan.
- Heat the mixture over medium heat until it nears boiling, then remove from heat to cool.
- Cut the ginger into 5 cm pieces and scrub them under water.
- Scrape the outer skin off the ginger with a spoon and set aside the pink stems.
- Slice each piece of ginger as thinly as possible.
- Blanch the ginger slices in boiling water for 1 minute.
- Drain the ginger and sprinkle with salt, allowing it to cool.
- Squeeze out any excess liquid from the cooled ginger.
- Transfer the cooled pickling liquid to a container, remove the kombu, and add the blanched ginger slices.
- Cover and refrigerate for at least 24 hours before serving.
Notes
Allowing the ginger to sit for longer than 24 hours can enhance flavor. Use fresh ginger for the best results.
