
📑 Table of Contents ▶
- Coconut Shrimp: The Basics
- Fundamentals
- Preparation/Setup
- Directions
- Coconut Shrimp: Perfecting Techniques
- Technique
- Tips and Tricks
- Coconut Shrimp: Achieving Perfect Results
- Perfecting Results
- Troubleshooting and Variations
- Coconut Shrimp: Serving and Storing
- Serving and Presentation
- Pairings and Storage
- Coconut Shrimp with Sweet Chili Mayo
Coconut Shrimp with Sweet Chili Mayo: A Tasty Delight!
Cooking coconut shrimp brings a rush of memories. Picture a warm coastal evening, the sun beginning to set, and a platter of golden-brown coconut shrimp sizzling away on the grill. This dish not only satisfies the taste buds but also evokes feelings of beach vacations and joyful gatherings with friends. Coconut shrimp offers a delightful crunch complemented by sweet, tangy moments, which brings everyone around the table together.
Given the simplicity of this recipe, it allows the vibrant flavors of shrimp and coconut to shine without much fuss. Dipping each crispy piece into sweet chili mayo adds a zing that makes every bite memorable. Whether hosting a backyard barbecue or looking for an easy weeknight dinner, this dish delivers on all fronts.
With just a few ingredients, you can effortlessly whip together a plate of coconut shrimp to please any crowd. Let’s dive into the details of making this tasty seafood delight!
Coconut Shrimp: The Basics
Fundamentals
Coconut shrimp combines sweet and savory elements, creating an irresistible dish. Its crunch comes from panko breadcrumbs and shredded coconut, which together form a golden coating. The shrimp serves as the perfect canvas for these flavors. Ensuring you use large shrimp adds an extra meaty texture that pairs beautifully with the crispy coating.
Preparing coconut shrimp breaks down into a few simple steps. Each shrimp gets a coating of flour, then a dip in beaten eggs, and finally a generous layer of the coconut-panko mix. This method locks in moisture while contributing to the dish’s delightful crunch.
Preparation/Setup
Start by gathering your ingredients and arranging them for easy access. Having three separate bowls ready will streamline the coating process. In the first bowl, place a cup of all-purpose flour seasoned with salt and pepper. The second holds the beaten eggs, and the third combines shredded coconut and panko breadcrumbs.
This setup minimizes mess and saves time. Make sure to have oil ready for frying to avoid delays in cooking. Reach for a heavy-bottomed frying pan to heat the oil. Ensuring the right oil temperature will guarantee crispy shrimp that don’t absorb too much oil.
Ingredients
To prepare coconut shrimp, you will need the following:
- 1 pound large shrimp, peeled and deveined
- 1 cup shredded coconut
- 1 cup panko breadcrumbs
- 2 eggs, beaten
- 1 cup all-purpose flour
- 1 cup sweet chili sauce
- 1 tablespoon lime juice
- Salt and pepper to taste
- Oil for frying
These straightforward ingredients come together to create an extraordinary dish.
Directions
- In a bowl, mix the sweet chili sauce and lime juice; set aside for dipping.
- Prepare three separate bowls: one with flour, one with beaten eggs, and one with a mixture of shredded coconut and panko breadcrumbs.
- Season the flour with salt and pepper to taste.
- Dip each shrimp first in the flour, then in the egg, and finally coat with the coconut-panko mixture.
- Heat oil in a frying pan over medium heat.
- Fry the shrimp in batches until golden brown and crispy, about 2-3 minutes per side.
- Remove from oil and drain on paper towels.
- Serve hot with the sweet chili mayo on the side.
Coconut Shrimp: Perfecting Techniques
Technique
Certain techniques elevate coconut shrimp to gourmet status. Ensuring shrimp stay juicy while obtaining a crispy exterior requires attention to detail. Gently press the coconut-panko mix onto each shrimp to form a good layer. This ensures that every bite bursts with flavor and crunch.
Frying in small batches also aids in maintaining the oil’s temperature. By avoiding overcrowding, you prevent the shrimp from steaming instead of frying. Achieving that perfect golden brown color indicates a well-fried shrimp, guaranteeing a delightful crunch.
Tips and Tricks
For the best results, consider these tips. First, choose high-quality large shrimp for a satisfying bite. When frying, maintain oil temperature around 350°F; use a thermometer for accuracy. This aids in crisping up the shrimp perfectly.
If you prefer an even more coconut-forward flavor, try adding a touch of coconut milk to the egg mixture. This step infuses an extra layer of coconut flavor into the shrimp.
Lastly, ensure proper storage after cooking. If you happen to have leftovers, store them in an airtight container in the refrigerator. Reheating in the oven helps retain crispness, keeping the flavor intact.
Coconut Shrimp: Achieving Perfect Results
Perfecting Results
Perfecting coconut shrimp comes with practice. The crunch should be a gratifying contrast to the tender shrimp within. Monitor the frying process closely, adjusting the heat as needed to achieve consistent results.
Experimenting with dipping sauces can also enhance your coconut shrimp experience. While sweet chili mayo is a classic choice, spicy aioli or even a mango salsa can introduce delightful new flavors.
Troubleshooting and Variations
Sometimes, things don’t go as planned. If shrimp turn out too greasy, the oil might not have been hot enough during frying. A good tip is to test the oil with a small piece of batter; it should sizzle upon contact.
Variations on this recipe include adding spices to the flour for a twist. Cayenne pepper or garlic powder can add an extra kick, giving coconut shrimp a distinctive touch. Alternatively, taking this dish baked instead of fried can make it healthier while still remaining delicious.
Coconut Shrimp: Serving and Storing
Serving and Presentation
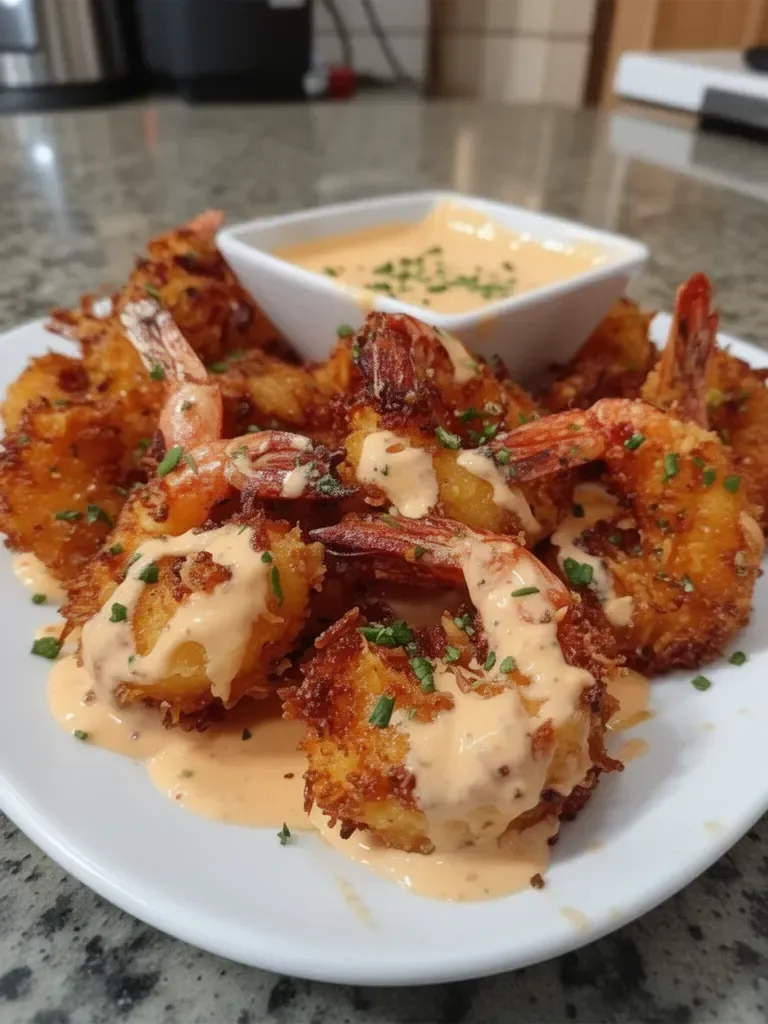
Plating coconut shrimp creates an opportunity to impress. Arrange the shrimp on a colorful platter, garnishing with sliced limes and fresh herbs for a pop of freshness. The sweet chili mayo can be served in a small bowl for dipping, inviting your guests to dive in.
Pairings and Storage
Coconut shrimp pairs beautifully with various sides. Consider a fresh green salad topped with citrus dressing, or serve alongside a tropical fruit salsa. For storage, cool any leftovers to room temperature before placing them in the refrigerator. Properly sealed, they remain enjoyable for up to two days.
When ready to enjoy again, reheating in the oven helps restore that delightful crispiness without sacrificing flavor.
Coconut shrimp serves as a celebration of flavor, texture, and joyful gatherings. With a simple recipe and the right techniques, it transforms any meal into a festive occasion. Enjoy your culinary journey with this exotic seafood delight!
Print
Coconut Shrimp with Sweet Chili Mayo
- Prep Time: 15 minutes
- Cook Time: 15 minutes
- Total Time: 30 minutes
- Yield: 4 servings
- Category: Appetizer
- Method: Frying
- Cuisine: Seafood
- Diet: Gluten-Free (if using gluten-free panko)
Description
A delightful and crispy dish of coconut shrimp served with a sweet chili mayo dipping sauce, perfect for any gathering or weeknight dinner.
Ingredients
- 1 pound large shrimp, peeled and deveined
- 1 cup shredded coconut
- 1 cup panko breadcrumbs
- 2 eggs, beaten
- 1 cup all-purpose flour
- 1 cup sweet chili sauce
- 1 tablespoon lime juice
- Salt and pepper to taste
- Oil for frying
Instructions
- Mix the sweet chili sauce and lime juice; set aside for dipping.
- Prepare three separate bowls: one with flour, one with beaten eggs, and one with a mixture of shredded coconut and panko breadcrumbs.
- Season the flour with salt and pepper to taste.
- Dip each shrimp first in the flour, then in the egg, and finally coat with the coconut-panko mixture.
- Heat oil in a frying pan over medium heat.
- Fry the shrimp in batches until golden brown and crispy, about 2-3 minutes per side.
- Remove from oil and drain on paper towels.
- Serve hot with the sweet chili mayo on the side.
Notes
For a more intense coconut flavor, consider adding coconut milk to the egg mixture. Store leftovers in an airtight container in the refrigerator and reheat in the oven for best results.
