
📑 Table of Contents ▶
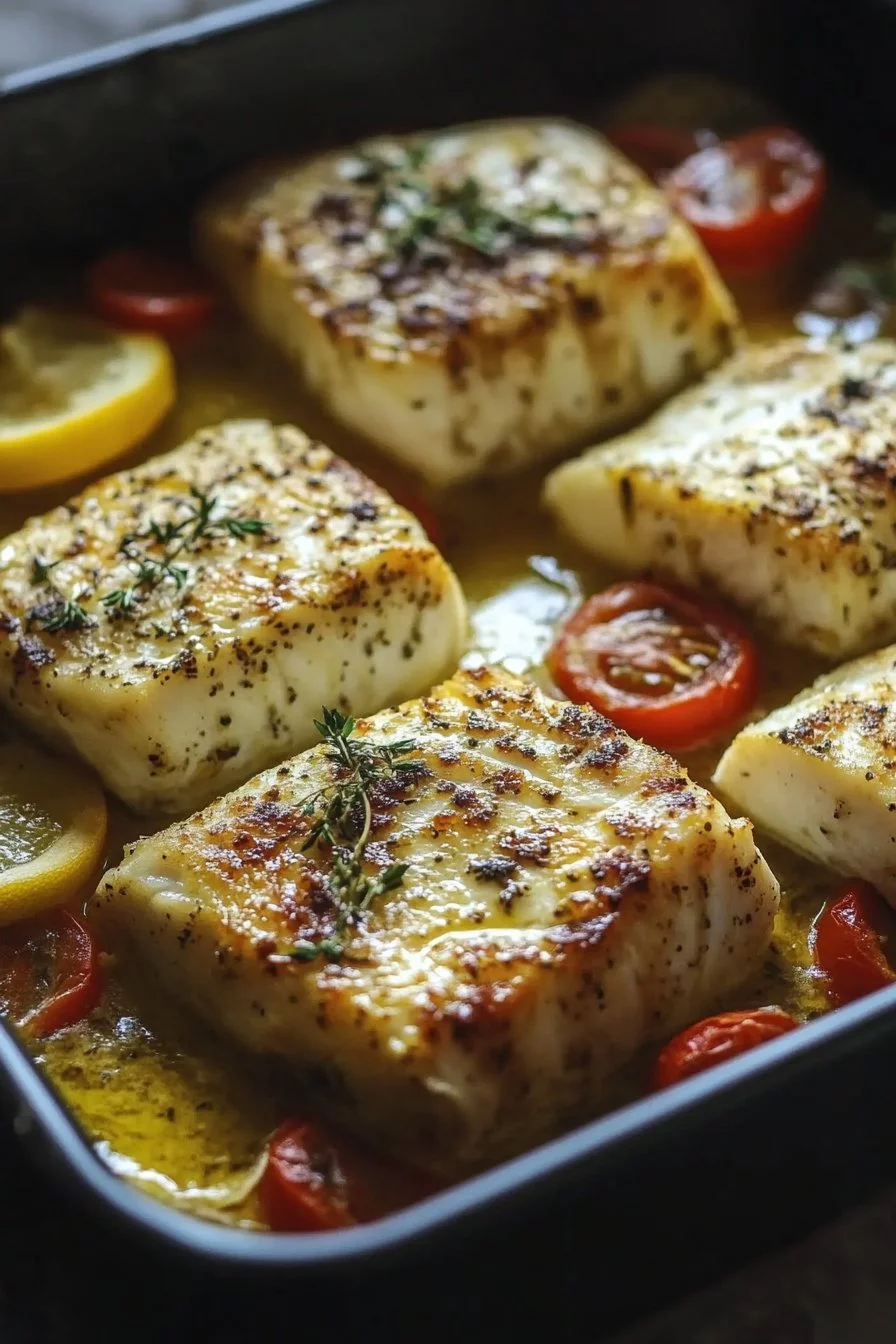
Creamy Baked Halibut
Perfect moments often revolve around food, especially when it comes to seafood. One of my fondest memories stems from family gatherings where the aroma of a fresh halibut dish wafted through the air, igniting laughter and conversation. Creamy baked halibut captures that essence, combining flakiness with rich flavors that warm the heart.
The beauty of creamy baked halibut is not just in its taste but also in its simplicity. With just a few accessible ingredients, it transforms into a dish worthy of any occasion. Every bite immerses you in smooth creaminess, complemented by the zestiness of lemon and subtle notes of garlic and fresh herbs. This dish doesn’t just satisfy hunger; it creates moments to savor with loved ones around the dinner table.
Whether you seek a weeknight meal or something special for a celebration, creamy baked halibut won’t disappoint. Let’s dive deep into this rich, flavorful dish that invites you to embrace the culinary joys of seafood cooking.
Creamy Baked Halibut
Fundamentals
Creamy baked halibut stands out among seafood dishes thanks to its delightful texture and rich flavor profile. Understanding the key principles behind this recipe helps ensure success every time. Start with fresh halibut, known for its mild sweetness and firm flesh, ensuring a satisfying bite. The combination of heavy cream adds a luxurious touch, transforming your halibut into an indulgent experience, while lemon juice cuts through the richness, bringing balance.
Garlic enhances the dish’s flavor, lending aromatic qualities that complement the halibut beautifully. Fresh herbs like dill or parsley add a hint of freshness, making each bite vibrant. Seasoning with salt and pepper at every step elevates the dish, enhancing the natural flavors in each component.
Preparation/setup
Preparing creamy baked halibut involves basic yet crucial steps. Begin by preheating your oven to 375°F (190°C), setting the stage for an evenly cooked dish. Greasing your baking dish ensures that the halibut easily releases from the pan, preventing any sad, broken fillets at serving time.
Next, season the halibut fillets with salt and pepper, ensuring they’re evenly coated. This simple step imbues the fish with flavor, enhancing the overall dish. Placing the seasoned fillets in the prepared dish prepares them for the luxurious creamy bath ahead.
Ingredients
To prepare creamy baked halibut, gather the following:
- 4 halibut fillets
- 1 cup heavy cream
- 2 tablespoons lemon juice
- 3 garlic cloves, minced
- 2 tablespoons fresh dill or parsley, chopped
- Salt and pepper to taste
These ingredients reflect a harmony of flavors aimed at elevating the halibut while remaining uncomplicated.
Directions
- Preheat your oven to 375°F (190°C) and grease a baking dish.
- Season the halibut fillets with salt and pepper; place them in the prepared dish.
- In a bowl, whisk together the heavy cream, minced garlic, and lemon juice until smooth.
- Stir in the chopped herbs into the creamy mixture.
- Pour the cream mixture over the halibut fillets, ensuring even coverage.
- Bake for 20-25 minutes until the fish flakes easily with a fork and is golden brown on top.
Creamy Halibut Variations
Technique
Several techniques enhance the enjoyment of creamy baked halibut. One effective method involves broiling the dish for a few minutes at the end of the baking process, creating a beautifully golden top that adds visual appeal. This additional step not only improves texture but also enhances flavors, offering a delightful contrast to the creamy base.
Another technique is to substitute different herbs, tailoring the recipe to your preferences. While dill and parsley provide flavorful notes, consider experimenting with tarragon or chives to reinvent the dish. This flexibility allows you to customize creamy baked halibut to suit your taste.
Tips/tricks
To perfect your creamy baked halibut, pay attention to timing. Ensure the fish reaches an internal temperature of 145°F; doing so guarantees a safe and delicious meal. Avoid overcooking the halibut, as this could lead to a dry texture, detracting from the creamy experience you strive for.
An additional tip involves tasting the cream mixture before pouring it over the halibut. Adjust the seasoning if necessary, ensuring every bite delivers on taste.
Perfecting Results
Perfecting results
For those eager to achieve exceptional results, focus on selecting quality halibut. Freshness plays a vital role in flavor profile and texture. Purchase fish from a reputable source and consider asking for guidance on choosing the freshest fillets available.
Another way to ensure perfection in creamy baked halibut lies in the baking method. Monitor the cooking process closely, especially during the last few minutes. Your goal is to achieve a perfect golden brown top while maintaining a tender, flaky interior.
Troubleshooting/variations
Occasionally, challenges may arise while preparing creamy baked halibut. If the dish appears undercooked after the suggested baking time, cover it with foil and return it to the oven for an additional 5-10 minutes. This practice allows for even cooking without sacrificing the creaminess or flavor.
If the halibut is overcooked, consider serving it over a bed of steamed vegetables; doing so helps mask any dryness while adding further nutrition to your meal.
Serving and Storage
Serving/presentation
To serve creamy baked halibut, consider presenting it straight from the oven. Pair it with a side of roasted vegetables or a fresh salad, creating a delightful balance of flavors and textures. When garnishing, sprinkle extra fresh herbs on top to brighten the dish visually and in flavor.
This approach showcases the halibut while providing guests with a well-rounded and appealing plate. Serve with a lemon wedge on the side, allowing diners to enhance the flavor according to their taste.
Pairings/storage
Creamy baked halibut pairs beautifully with many side dishes, like rice pilaf or buttered asparagus, enhancing the overall dining experience. For storage, allow leftovers to cool completely before transferring them to an airtight container. Refrigeration maintains freshness for up to three days.
Reheating is straightforward; use the oven to gently warm the dish, preserving the creamy texture. Enjoying leftovers is another lovely way to embrace the flavors of creamy baked halibut throughout the week.
Creamy baked halibut encapsulates the spirit of seafood cooking. Its delightful combination of flavors and textures ensures each meal becomes memorable, inviting you to share the goodness with family and friends.
Print
Creamy Baked Halibut
- Prep Time: 15
- Cook Time: 25
- Total Time: 40
- Yield: 4 servings
- Category: Main Course
- Method: Baking
- Cuisine: Seafood
- Diet: Pescatarian
Description
A rich and creamy baked halibut dish that combines flakiness and vibrant flavors with lemon and fresh herbs, perfect for any occasion.
Ingredients
- 4 halibut fillets
- 1 cup heavy cream
- 2 tablespoons lemon juice
- 3 garlic cloves, minced
- 2 tablespoons fresh dill or parsley, chopped
- Salt and pepper to taste
Instructions
- Preheat your oven to 375°F (190°C) and grease a baking dish.
- Season the halibut fillets with salt and pepper; place them in the prepared dish.
- In a bowl, whisk together the heavy cream, minced garlic, and lemon juice until smooth.
- Stir in the chopped herbs into the creamy mixture.
- Pour the cream mixture over the halibut fillets, ensuring even coverage.
- Bake for 20-25 minutes until the fish flakes easily with a fork and is golden brown on top.
Notes
Serve with a side of roasted vegetables or a fresh salad and a lemon wedge for added flavor. Monitor the cooking process closely to avoid overcooking.
