

📑 Table of Contents ▶
Homemade Sushi
Cooking homemade sushi brings back memories of gatherings with friends and family. Recreating that experience in the comfort of one’s home adds a unique touch to the meal. Sushi encapsulates a wonderful blend of fresh seafood, delicate rice, and vibrant veggies, all beautifully wrapped in nori sheets. Preparing sushi is not just about feeding your belly; it’s about crafting an experience that delights every sense.
The art of rolling sushi can feel daunting, but it’s easily achievable with practice. Sushi rice, which serves as the base, provides the perfect sticky texture that binds the ingredients together. Fresh fish like salmon, tuna, and shrimp, along with crispy vegetables such as cucumber and avocado, elevate your sushi rolls to a whole new level. It’s a dish that embodies both creativity and satisfaction, allowing home cooks to explore their culinary skills.
At the heart of homemade sushi lies the joy of sharing. It’s easy to invite friends over for a sushi night, where everyone can dive in and assemble their rolls. This communal cooking experience transforms simple ingredients into memories that linger long after the last bite. With these thoughts in mind, let’s delve into the fundamentals of making delicious homemade sushi.
Homemade Sushi Essentials
Fundamentals
Making sushi at home can seem complex, but breaking it down into parts simplifies the process. The foundation of sushi lies in the sushi rice. This short-grain rice sticks together when cooked, providing a base that holds the roll intact. Another essential element is the nori sheet, which brings everything together.
Seafood choices like salmon, tuna, and shrimp contribute rich flavors and textures. While traditional sushi focuses on raw fish, this recipe embraces the versatility of shrimp, which can be enjoyed cooked or raw. Then, we have fresh vegetables, such as crisp cucumber and creamy avocado, which add a refreshing crunch that balances the richness of the fish.
Preparation/setup
Preparation begins with the sushi rice. Cook it according to the package instructions and allow it to cool to room temperature. This crucial step ensures the rice is sticky yet manageable. Next, prepare your filling options by slicing the fish and vegetables into thin, even strips. This uniformity helps in rolling the sushi later.
Lay a nori sheet flat, shiny side down, on your sushi mat or a clean surface. Place the sushi rice carefully over the nori, leaving space at the edges to prevent overflow during the rolling process. This setup prepares you for the most exciting part—adding the fillings!
Ingredients
- Sushi rice
- Nori sheets
- Salmon
- Tuna
- Shrimp
- Vegetables (cucumber, avocado, etc.)
- Soy sauce
- Wasabi
- Pickled ginger
Directions
- Cook sushi rice according to package instructions and let it cool.
- Prepare your filling options: slice salmon, tuna, shrimp, and vegetables.
- Lay a nori sheet on a flat surface.
- Spread a layer of sushi rice over the nori, leaving space at the edges.
- Arrange your chosen fillings in the center of the rice.
- Using a sushi mat or your hands, roll the nori tightly around the fillings.
- Seal the edge with a bit of water.
- Slice the roll into bite-sized pieces.
- Serve with soy sauce, wasabi, and pickled ginger.
Creative Sushi Techniques
Technique
Perfecting sushi rolling technique can elevate your homemade sushi to restaurant-quality standards. Begin by ensuring the rice is not too sticky or too dry. An appropriate amount creates a pleasant texture. When rolling the sushi, keep a firm hand but avoid applying too much pressure, which could squish your ingredients out.
A sushi mat offers incredible support when rolling, but practicing with your hands helps build confidence. Move from the edge with fillings inward, using your thumbs to tuck in the edge while keeping the roll tight. This motion creates that characteristic sushi shape.
Tips/tricks
Experimenting with various fillings can enhance your sushi experience. Don’t hesitate to try different combinations of fish, vegetables, and sauces. Using grilled shrimp or marinated tofu caters to different preferences, making sushi a versatile dish.
Keep a small bowl of water nearby to wet your fingers, keeping the rice from sticking to your hands. This simple trick can assure cleaner rolls and a more enjoyable experience. Always slice the sushi with a sharp knife for clean cuts, making presentation impeccable.
Refining Your Homemade Sushi
Perfecting results
To achieve perfect sushi, focus on balancing flavors and textures. The ratio of rice to fillings plays a vital role in achieving the right bite. Too much rice can overpower the fresh ingredients, while too little leaves the roll bland. Experimentation will eventually lead to your preferred ratio.
The quality of ingredients also matters. Choose the freshest fish and ripe vegetables to create vibrant flavors. If possible, buy your fish from a trusted source to ensure freshness and safety.
Troubleshooting/variations
Rolling sushi may not always go according to plan. If the nori rips, don’t panic. Simply peel it back and re-roll gently. For overly dry rice, sprinkle a bit of water on the rice before rolling to bring moisture back. If you want to add a twist, consider making a sushi burrito by stacking ingredients and rolling it into a large wrap for a fun, oversized sushi option.
Serving Your Homemade Sushi
Serving/presentation
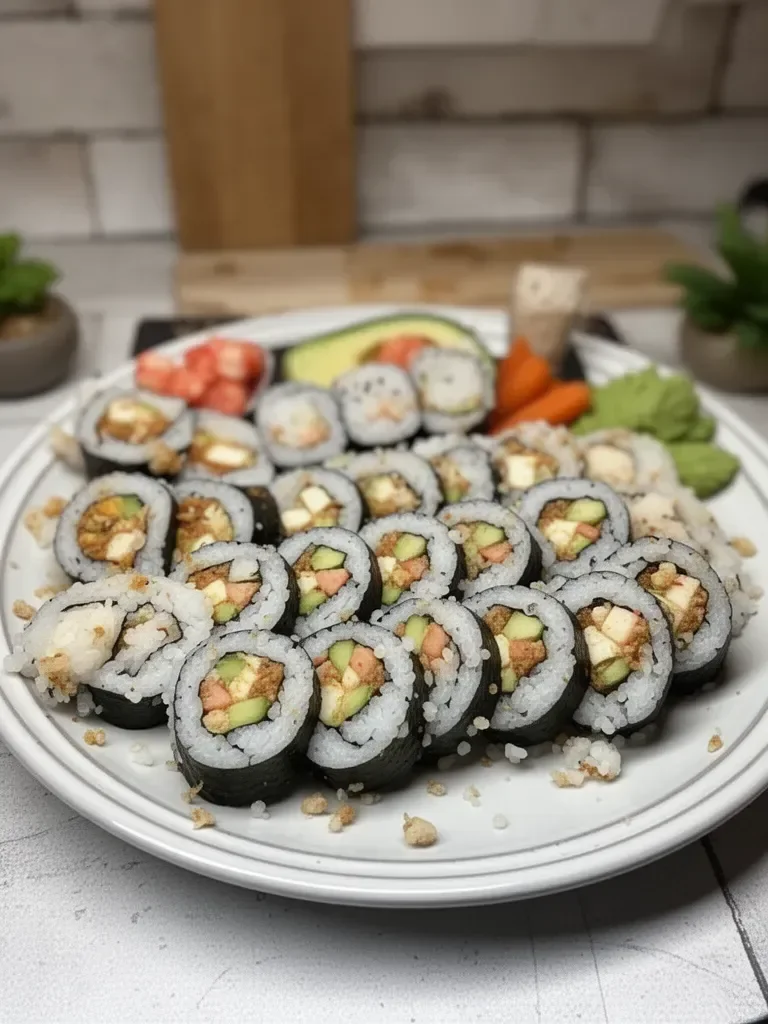
Presentation is key to enjoying homemade sushi. Slice your rolls with precision to reveal beautiful cross-sections. Arrange them on a platter, allowing space for dipping sauces. Garnish with pickled ginger on the side for that authentic touch and add a small dollop of wasabi for those who enjoy a kick.
Consider including a variety of sushi types on the platter, such as nigiri or temaki, for visual appeal. A touch of creativity in arranging your sushi can give it a gourmet feel.
Pairings/storage
Sushi pairs beautifully with soy sauce, wasabi, and pickled ginger to cleanse the palate. For beverages, serve chilled green tea or sparkling water to refresh the taste buds without overpowering the flavors.
When storing leftover sushi, wrap tightly in plastic to prevent dryness. Consume within a day to retain freshness. Although sushi tastes best when served immediately, you can enjoy leftover sushi the next day if stored properly.
Conclusion
Cooking homemade sushi transforms simple ingredients into memorable experiences. With fresh fish, vibrant vegetables, and the perfect rice, this dish captures the essence of flavor, texture, and community. Embracing the art of sushi making fosters creativity and presents a fun way to gather and share. Enjoy rolling those sushi masterpieces!
Print
Homemade Sushi
- Prep Time: 15 minutes
- Cook Time: 30 minutes
- Total Time: 45 minutes
- Yield: 4 servings
- Category: Main Course
- Method: Rolling
- Cuisine: Japanese
- Diet: Pescatarian
Description
Delight in the art of making homemade sushi that brings together fresh seafood and vibrant vegetables in a communal cooking experience.
Ingredients
- Sushi rice
- Nori sheets
- Salmon
- Tuna
- Shrimp
- Vegetables (cucumber, avocado, etc.)
- Soy sauce
- Wasabi
- Pickled ginger
Instructions
- Cook sushi rice according to package instructions and let it cool.
- Prepare your filling options: slice salmon, tuna, shrimp, and vegetables.
- Lay a nori sheet on a flat surface.
- Spread a layer of sushi rice over the nori, leaving space at the edges.
- Arrange your chosen fillings in the center of the rice.
- Using a sushi mat or your hands, roll the nori tightly around the fillings.
- Seal the edge with a bit of water.
- Slice the roll into bite-sized pieces.
- Serve with soy sauce, wasabi, and pickled ginger.
Notes
Experiment with different fillings and keep a bowl of water nearby to moisten hands while rolling.
