
📑 Table of Contents ▶
California Crunch Roll Sushi
There’s something truly captivating about California Crunch Roll Sushi. The combination of flavors and textures creates a delightful experience in every bite. I still remember the first time I attempted to roll sushi in my own kitchen. The anticipation of crafting something so elegant and delicious filled the air, along with the warm, comforting aroma of rice cooking.
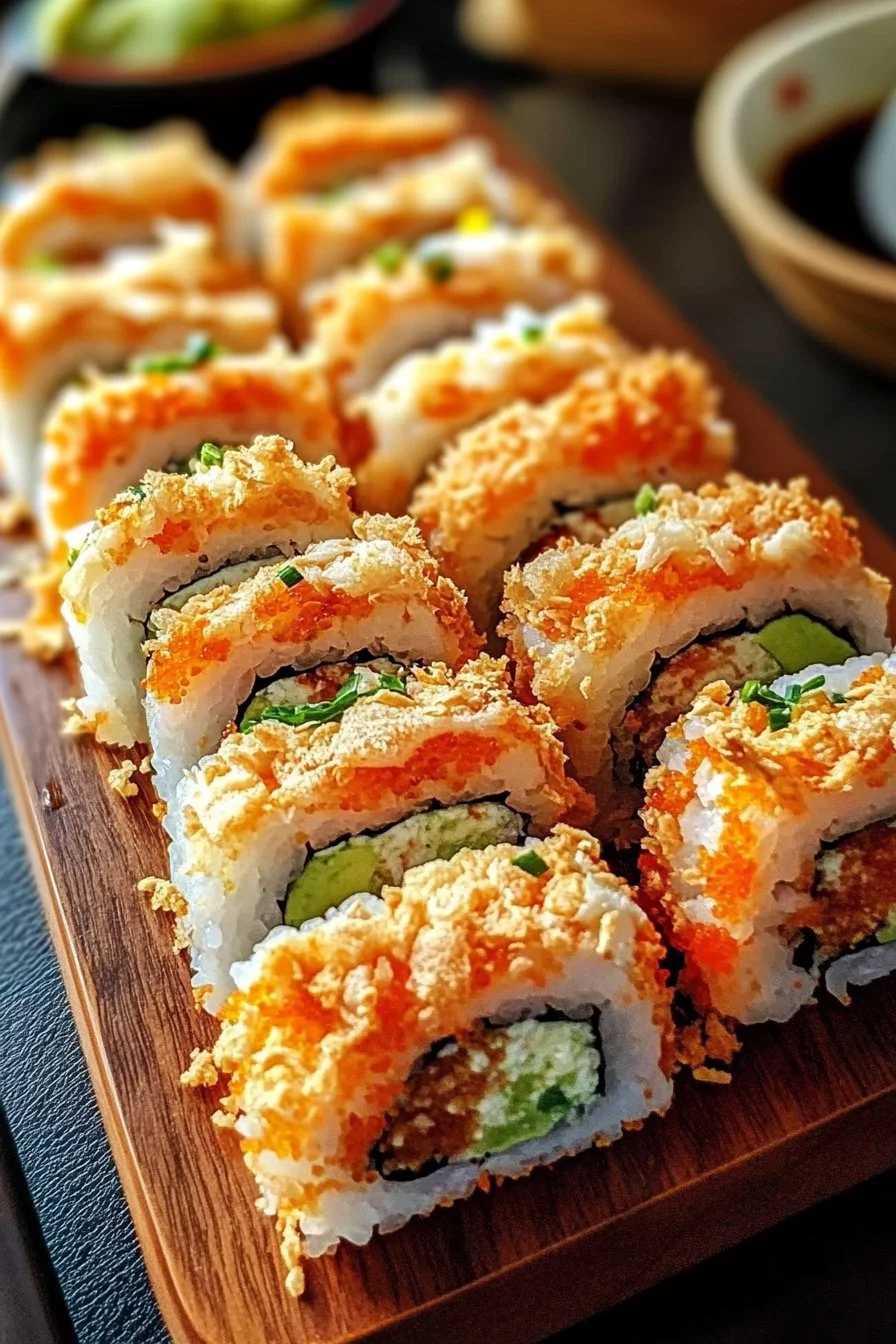
California Crunch Roll Sushi balances creamy avocado, crisp cucumber, and succulent imitation crab meat. Layered on a bed of perfectly seasoned sushi rice, this dish becomes an attractive option for gatherings or a satisfying weeknight meal. One might think sushi-making is reserved for those with expert culinary skills, but I assure you, with a little guidance, anyone can enjoy the art of creating sushi at home.
The fun of sushi-making lies not only in eating it but also in the joy of sharing the process with others. The vibrant colors and textures invite creativity while allowing room for personal touches. California Crunch Roll Sushi offers a perfect introduction to the wonderful world of sushi, proving that anyone can become a sushi enthusiast right at home.
California Crunch Roll Sushi Basics
Fundamentals
California Crunch Roll Sushi stems from a blend of traditional Japanese sushi and Californian innovation. It emphasizes freshness and simplicity while allowing distinct flavors to shine through. This style of sushi rolls typically includes that satisfying crunch factor, often achieved by frying or using crispy ingredients.
The art of sushi-making combines technique with creativity. Understanding the basics of rolling sushi, particularly how to handle sushi rice, is key. Once you get the hang of it, you can explore countless flavor combinations. Expect your culinary skills to grow with each roll you make, bringing joy and deliciousness to your kitchen.
Preparation/Setup
Setting up for California Crunch Roll Sushi requires minimal tools. You’ll need a bamboo sushi mat to help with rolling and a sharp knife for cutting. Measuring cups and bowls for mixing the rice manipulation ingredients are essential as well. A clean surface to work on keeps everything organized.
Begin by gathering all ingredients before you start. Having everything in place will streamline the process and minimize mess. Sushi making can be a bit tricky, but preparing ahead helps. The more organized your workspace, the more fun you’ll have crafting these delightful rolls.
Ingredients
Let’s dive into the essential ingredients for creating California Crunch Roll Sushi:
- 2 cups sushi rice
- 2 1/2 cups water
- 1/3 cup rice vinegar
- 2 tablespoons sugar
- 1/2 teaspoon salt
- 4 sheets nori (seaweed)
- 1 ripe avocado, sliced
- 1 cucumber, julienned
- 8 ounces imitation crab meat, shredded
- Panko breadcrumbs
- Soy sauce (for serving)
- Wasabi (for serving)
Each ingredient lended its unique flavor to the sushi roll while providing textural variety. Plus, imitation crab keeps it budget-friendly while adding a wonderful seafood essence to the dish, making it approachable for those unfamiliar with traditional sushi.
Directions
Follow these steps to assemble your California Crunch Roll Sushi:
-
Rinse the sushi rice under cold water until the water runs clear. Combine the rinsed rice and water in a pot, bringing it to a boil. Reduce the heat to low, cover, and simmer for about 20 minutes. Once cooked, let it cool.
-
While the rice cools, mix rice vinegar, sugar, and salt in a small bowl until dissolved. Stir this mixture into the cooled rice, ensuring every grain gets the flavor infusion.
-
Place a bamboo sushi mat on a flat surface and lay a sheet of nori on top. Spread a thin layer of sushi rice over the nori, leaving a 1-inch border at the top.
-
Lay slices of avocado, julienned cucumber, and shredded crab meat in a line across the rice, creating a vibrant color palette.
-
Carefully roll the sushi away from you, using the mat to keep it tight. Make sure to press gently throughout the process.
-
After rolling, gently squeeze the sushi mat to seal it, then slice the roll into bite-sized pieces with a sharp knife.
-
For an extra crunchy texture, coat the outside of the roll with panko breadcrumbs and lightly sear it in a pan to achieve a golden-brown finish.
-
Serve your California Crunch Roll Sushi with soy sauce and wasabi to elevate your dining experience.
Rolling Techniques for Your Sushi
Technique
Mastering the technique of rolling sushi can take practice, but the results are rewarding. Focus on not overfilling the sushi roll; this might cause it to fall apart. The key lies in maintaining balance—ensuring that the filling complements the rice without overwhelming it.
When rolling sushi, always use the bamboo mat to create a tight roll. It acts as your best tool, helping you shape the sushi precisely. The first few rolls might be a bit awkward, but with time, confidence builds, leading to beautifully crafted sushi.
Tips/Tricks
-
Wet Your Hands: Sushi rice can be sticky. Wetting your hands with cold water makes it easier to handle without adding too much moisture.
-
Use Fresh Ingredients: Always choose ripe avocados and crisp cucumbers. Freshness enhances the flavors and textures, resulting in tastier sushi.
-
Experiment with Fillings: California Crunch Roll Sushi is versatile. Add different vegetables or proteins as you gain more confidence in wrapping sushi.
-
Practice Makes Perfect: Don’t worry if your first rolls aren’t perfect. Each attempt teaches you something new—embrace the learning curve.
Perfecting Your California Crunch Roll Sushi
Perfecting Results
Achieving perfection in California Crunch Roll Sushi means adjusting techniques and ingredients to suit personal preferences. Enjoy experimenting with varying amounts of filling or how tightly you roll.
Opt for high-quality sushi rice, as it should have the right amount of stickiness to keep everything together. Ensuring your rice is cooked properly also contributes to achieving that delightful texture, enhancing the overall dining experience.
Troubleshooting/Variations
Should your rice feel too dry, add a splash of rice vinegar while mixing. If too wet, allow it to cool before rolling. If the nori sheets are difficult to work with, consider lightly toasting them for a moment to make them more pliable.
For a twist, mix in sesame seeds with your panko breadcrumbs for added flavor. You can also swap the imitation crab meat for fresh seafood if you prefer.
Serving California Crunch Roll Sushi
Serving/Presentation
Serving California Crunch Roll Sushi becomes an art in itself. Arrange the sliced rolls on a platter creatively, alternating pieces so the vibrant colors pop against one another. Garnish with a sprinkle of sesame seeds or thinly sliced green onions for added appeal.
Small dishes of soy sauce and wasabi accompany the sushi perfectly, allowing everyone to customize their bites according to their taste.
Pairings/Storage
Pair your California Crunch Roll Sushi with small servings of pickled ginger for added flavor contrast. While sushi is best enjoyed fresh, it can be stored in an airtight container in the refrigerator for up to 24 hours. Always remember to consume it within a day for optimal texture and taste.
Feel free to toss in a refreshing salad or miso soup to complement your sushi dinner. These dishes provide a superb balance of flavors that round off the meal beautifully.
As you explore the art of making California Crunch Roll Sushi, keep in mind that each experience perfects your skills and introduces you to new horizons of flavor.
Crafting sushi at home not only satisfies your cravings but also nurtures creativity in the kitchen, making every delicious bite worth savoring.
Print
California Crunch Roll Sushi
- Prep Time: 15 minutes
- Cook Time: 30 minutes
- Total Time: 45 minutes
- Yield: 4 servings
- Category: Main Course
- Method: Rolling
- Cuisine: Japanese
- Diet: Pescatarian
Description
A delightful sushi roll featuring creamy avocado, crisp cucumber, and succulent imitation crab meat, all rolled in perfectly seasoned sushi rice and enhanced with crunchy panko breadcrumbs.
Ingredients
- 2 cups sushi rice
- 2 1/2 cups water
- 1/3 cup rice vinegar
- 2 tablespoons sugar
- 1/2 teaspoon salt
- 4 sheets nori (seaweed)
- 1 ripe avocado, sliced
- 1 cucumber, julienned
- 8 ounces imitation crab meat, shredded
- Panko breadcrumbs
- Soy sauce (for serving)
- Wasabi (for serving)
Instructions
- Rinse the sushi rice under cold water until the water runs clear. Combine the rinsed rice and water in a pot, bringing it to a boil. Reduce the heat to low, cover, and simmer for about 20 minutes. Once cooked, let it cool.
- While the rice cools, mix rice vinegar, sugar, and salt in a small bowl until dissolved. Stir this mixture into the cooled rice, ensuring every grain gets the flavor infusion.
- Place a bamboo sushi mat on a flat surface and lay a sheet of nori on top. Spread a thin layer of sushi rice over the nori, leaving a 1-inch border at the top.
- Lay slices of avocado, julienned cucumber, and shredded crab meat in a line across the rice, creating a vibrant color palette.
- Carefully roll the sushi away from you, using the mat to keep it tight. Make sure to press gently throughout the process.
- After rolling, gently squeeze the sushi mat to seal it, then slice the roll into bite-sized pieces with a sharp knife.
- For an extra crunchy texture, coat the outside of the roll with panko breadcrumbs and lightly sear it in a pan to achieve a golden-brown finish.
- Serve your California Crunch Roll Sushi with soy sauce and wasabi to elevate your dining experience.
Notes
Rolling sushi can be tricky. Ensure your hands are wet to handle sticky rice easily, and experiment with fillings as you gain confidence.
